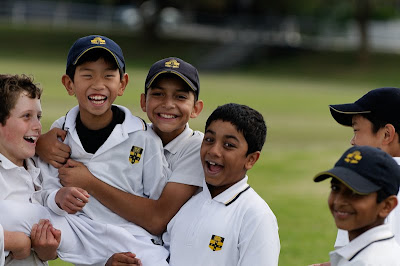
You get home and disaster - instead of a gem, your photo is a dud. Or is it? To explain how to get the best of your photos, this article will show what had to be done to a cricket photo to make it a 'keeper'.
Fixing your photos can be done in a variety of programs including Photoshop Elements, Picasa and iphoto. Whatever your chosen application, fixing photos is an easy five step process.
1. Decide what's important and crop out what's not.
2. Delete distractions from the cropped image
3. Fix the scene's white balance and colour
4. Fix the scene's brightness.
5. Sharpen the image
As evidenced below, this approach can be applied to any photo, from landscapes to group photos:

A Group photo after cropping, adjusting white balance and colour, brightening and sharpening

A landscape before cropping, adjusting white balance and colour, brightening and sharpening

A landscape after cropping, adjusting white balance and colour, brightening and sharpening
Hopefully the above examples have convinced you that miracles can be achieved with your photos. So to help you with your own images, I'll explain how I have applied the five step process to improve a cricket photo.

Untouched image
Step 1: Crop the image
In the above photo the wicket keeper has caught out the batsman but you would never see this unless you peered closely because the image doesn't draw your attention to the wicket keeper. This is because there is too much irrelevant information in the photo such as the bare earth in the foreground, the white cone in the left middle ground, the blue bag in the right background and the cars in the left background. To remove these distractions you need to use the 'crop' tool in your chosen application which will result in the following image
Cropped image
Thanks to your cropping, you no longer see blue bags, cars and bare earth so you ending up seeing a lot more of the wicket keeper. You could obsessively delete anything other than the wicket keeper, beginning with the mother in the pink sweater sitting in the chair but sometimes background items give the image context. What doesn't, in my view, is the white cone to the right of the bowler so I'll delete it using the 'healing' or 'clone brush. Deleting this small object will make an enormous difference to how the viewer perceives the photo because the eye tends to go to the brighter parts of a photo and not in this photo automatically to the wicket keeper whose face is dark due to his complexion and his helmet shading his face.

Cropped image with local healing to remove white cone
Step 3: Fix the scene's white balance and colour
The photo is drab because it was taken on an overcast day so colours look dull.
To make it more interesting, you need to fix the white balance of the photo. White balance is the process of removing unrealistic color casts, so that objects which appear white in person are rendered white in your photo. Proper camera white balance has to take into account the "color temperature" of a light source, which refers to the relative warmth or coolness of white light. Our eyes are very good at judging what is white under different light sources, however digital cameras often have great difficulty with this.
To fix white balance, with the 'white balance' tool click on a neutral colour. In this photo, clicking onto the white shirt of the bowler works wonders as demonstrated below.
Cropped image with local healing to remove white cone and white balanced.
At this stage you should also consider the overall colour of the photo - increasing the saturation will give the photo more 'kick' as evidenced in the photo below.

Cropped image with local healing to remove white cone, white balanced and increased colour saturation.
Step 4: Fix the scene's brightness
The photo still looks drab because of the flat lighting so you should play with the 'exposure', 'brightness' and 'contrast' settings (in that order) until the photo becomes punchy. There is no right or wrong way to do this, just small adjustments until the image looks better and remember, there is only so much you can achieve with a photo (you cannot turn night into day).

Cropped image with local healing to remove white cone, white balanced, increased colour saturation and adjusted brightness.
If your application has localised adjustments, you want to brighten the cricket ball and the wicket keeper's face to make the viewer's eye go to them (remember the eye prefers brighter parts of the photo and the wicket keeper and the cricket ball are having to compete with the white cricket shirts, trousers, socks and shoes.

Cropped image with local healing to remove white cone, white balanced, increased colour saturation, adjusted brightness and localised brightness on cricket ball and wicket keeper's face.
Step 5: Sharpen the image
The final step is to sharpen the image - too little and the image will be soft or 'mushy', too much and the image will be pixellated or 'scratchy'.

Cropped image with local healing to remove white cone, white balanced, increased colour saturation, adjusted brightness, localised brightness on cricket ball and wicket keeper's face and sharpened.
In conclusion, with a little patience, you can turn rough diamonds into gemstones following the five step process above.


No comments:
Post a Comment